Lightscoop: My New Favorite!

0 Edit Artikel

Before I say anything else, you need to know that I received no compensation for this post. I’m simply madly in love with this new gadget, and you MUST know about it!

The other day I was stalking perusing Tatertots and Jello, and Jen mentioned this product. It’s called Lightscoop, and it changes the way you’ll take pictures with a flash for-eh-vah.


Truth be told, I shoot everything in manual mode. My friend has the same camera as me, and she shoots entirely in automatic. What a shame, right? But I get it. Some people are just overwhelmed by it all, so they stick with what’s easy. Because there are some situations where you might need a flash, this is just the gadget for you.

All of my “before” shots are first. They are all shot in automatic mode, and each one of them called for a flash to be used—even though they were all shot during the day.

Lightscoop beforeLightscoop after 

Notice how the befores don’t give off the right coloring, and they’re bouncing light all over the place? Eww.

Lightscoop before Lightscoop after

Here’s my bed-headed little one on the computer. I peruse Tatertots and Jello. She peruses new American Girl dolls. Notice the washed out couch? The over-reflected hair? Check out the after!

lightscoop beforelightscoop after

I still can’t get over the next one. Shot during the day (around 12:30?). I think I pushed the flash up on this one, so I don’t know that automatic would have called for it. However, look what the Lightscoop did just 7.3 seconds later. Incredible.

lightscoop beforelightscoop after 

And finally, my needs-a-haircut son. He doesn’t peruse. Not when he’s watching Star Wars. He also doesn’t wear a shirt. Like ever. As he puts it, “I need my muscles to breath.” Here’s the before…

x

And here’s the after. Looks like they were shot at entirely different times, right? The coloring is SO much better.

x

I’m not a super impulsive buyer (my indecisiveness is a curse, I tell ya!), but as soon as I saw that this bad boy was only $30, I scooped one right up. (Pun intended.)


Easy to install, inexpensive, and spectacular results! Can’t beat that! I put a link to their site on the logo.  Let me know if you take the plunge! I’m anxious to hear if you love it too!

DIY Bookshelves

0 Edit Artikel

Disclaimer: This is a long post. With a lot of pictures. I venture to say it’s taking me longer to get this post around than it was to actually do the project. With the cabinet finally finished, I realized that my daughter really needed some more room for her books. I didn’t want to fill that pretty thing with all books, so I had to come up with something.

So here’s the something.

DIY bookshelves

I will admit that it’s the first project involving wood/nails/labor that I’ve done completely by myself. Needless to say, I was a little apprehensive, but it turned out better than I expected.

DIY bookshelf

As the books were being placed on the shelves, my little one kept saying, “Hey! I forgot about that book!” “Oooh, I wanna read that one!” Mission. Accomplished.

front facing bookshelf   DIY bookshelf

How about a tutorial for this oh-so-easy project? The first stop was to Lowes for some primed MDF strips. I spent more money with the primed version; However, I know you could do this for less money. I knew I’d be painting it light, so I didn’t want to worry about priming it. Worth the money, really.

MDF with wood glue

I drew a small bead of wood glue along the edges to be nailed and held it for a few seconds. It offered some support and kept things from shifting while I was nailing them together.

how to build bookshelves

I knew I wanted three shelves, and they measured out around 27” each. This meant I needed an 8 foot piece of each. I took the three pieces up to the wood-cutter guy (official name) at Lowes and had him cut them. Yeehaw! How easy is that?

how to make bookshelves

After painting them (including the exposed edges), my husband screwed them into some studs on the wall. I didn’t bother hiding the screws. Who’s gonna see them?

DIY bookshelves

Because the beauty of this project is really in the color of the books, I wanted the shelves to be as simple and streamlined as possible. Luckily, that was also the easiest to build.

front facing bookshelves

And of course, it wouldn’t be a success unless this goofball liked them. I think she approves.

green beanbag

Supply breakdown:

  • 8 feet, 1x6 (three shelves at @ 27” each)
  • 8 feet 1x4
  • 8 feet 1x2…………………………….Total of $28.00
  • Wood Glue $2.97
  • Nails/nail gun, paint—already had

Show and Share Giveaway

0 Edit Artikel

This post brought to you by FRESCHETTA®. All opinions are 100% mine.

Pizza. It’s a staple at our house, so I was pretty thrilled that Freschetta not only has a new line of pizza flavors out, but they also asked if I would like to try some. Uh…yes, please. I have to admit—I’m a “basic pizza” eater. Pizza is pepperoni to me, so I went with the classic.

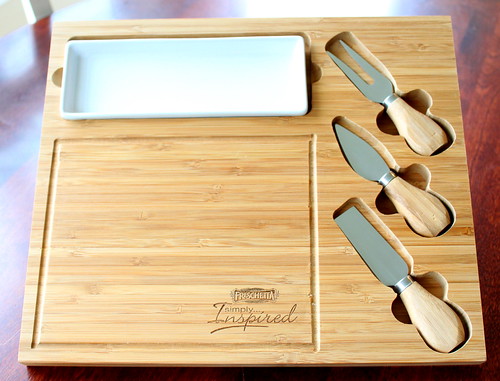
Not surprisingly, it was gone in a matter of moments. HUGE fan of the thin crust, by the way. There are several amazing flavors to choose from, but I think it’s pretty cool that they’re doing their part for the environment. They’re using less packaging materials and look what that means!

FRESCHETTA SIMPLY INSPIRED Frozen Pizza – 30% less packaging saves

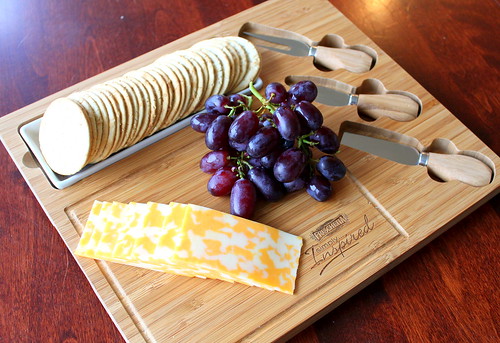
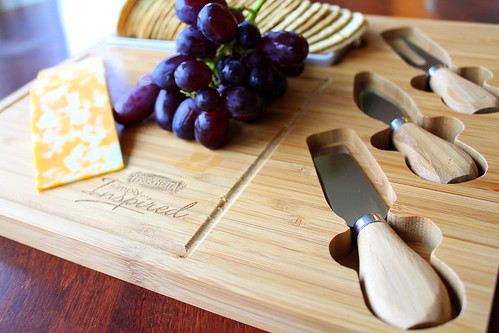
So what does this mean for you? We already know they’re a flavor-conscious brand, and they’re also environmentally friendly. To top it all off, they’ve got a pretty spectacular bamboo cutting board that they’re giving to one of you and a coupon for a FREE Freschetta pizza!

Because we’re a fancy family, this tray fit in perfectly with our dinner. The response was, “We’re getting cheese and grapes! Fancy, Mommy!”

How do you win?

  1. Enter this week’s Show and Share Day. Perhaps share some of your favorite flavors, so we can try them?
  2. Join Freschetta’s Facebook page for an extra entry. They offer weekly giveaways to their fans and they’ll be giving $2.00 off coupons soon!
  3. Share this giveaway through Twitter, Facebook, or on your blog for an extra entry each.

FRESCHETTA® Simply…Inspired™


Visit Sponsor's Site

The Art of the Toilet Paper Roll

0 Edit Artikel

Ahhhh….the master bedroom. It has eluded me for years, and I’m still trying to tackle it. It all comes down to one final element—art above our bed. I didn’t want to spend any much money; I was dealing with some difficult dimensions, and I wanted it to be VERY simple. How’s that for easy?

Here was my plan of attack--toilet paper or paper towel rolls. I tried using some wrapping paper rolls, but they were a little too thick to cut through easily, and they didn’t measure the same in width as the t.p. That stands for toilet paper—we’re tight like that.

toilet paper rolls

I measured out the rolls by about 1 1/2” marks and cut them into their little strips. Once they’re all cut out, I glued the joints of them together. I used hot glue because I knew I’d be painting them. Plus, it’s waaaaay faster.

paper towel rolls

I’ve seen them attached and arranged in a variety of ways, but I was very careful not to make mine too flowery. I didn’t really want flowers, but I did want a soft pattern. (The canvas was from Michaels for $15—it remains unpainted.)

paper roll art

I took the rolls/now shapes to the basement and spray painted away. I would highly recommend using primer for this. Obviously, these suckers soaked up the paint. I followed up with some glossy white paint.

just a girl paper roll art

So here it is. Toilet paper wall art. For $15.00.

paper roll art

Because my bedding and curtains have gray in them, I liked that the insides of the shapes throw off a bit of a gray tint. If you’re looking for a more solid color, I would look into painting them a little more carefully inside—perhaps with a paint brush?

just a girl toilet roll art

I’ll probably still play around with the shape of it. They’re easy to move around since I just attached with a little dollop (I like that word) of hot glue. When I get tired of it, I can throw out the rolls and reuse the canvas.

just a girl toilet paper art

toilet paper art

There’s some pretty good t.p. art out there. Googling it will provide you with a number of pictures, and you can just go from there. No “big reveal” of the bedroom just yet. Still some things to do, but THAT was a biggie.

The Cabinet is D-O-N-E

0 Edit Artikel

Okay. So it’s not completely done. I lied. But I figure I have held you off on this project for long enough. It just needs to be jewelry-fied, so I guess you can see it by now. Let’s take a look at the before, shall we?

china cabinet

I loved everything about it—the glass details, the shape, the storage, etc.  The wood was beautiful, but it was badly beat up. That certainly helped with my decision to paint. Of course, my favorite part of it was the price. $60.00 off Craigslist. Ya-to-the-hoo!

china cabinet

After taking it apart, this is what it turned into. For months. Michigan weather hit, and there was just no finishing it in that cold.

IMG_6222

And here it is today…

refinished cabinet

I seriously looked into crystal knobs for it, but the idea of filling holes, drilling new ones, and spending more money on this than I already had was not appealing to me.

refinished cabinet

I’m pretty much in love with it, and I’m taking my time filling the top with accessories. It’s quite the balance making sure I like the way it looks, and it’s still functional for my daughter’s things.

china cabinet detail

Of course, her favorite part needs to be gussied up as well. We’ll be working on that one very soon.

secretary

Well, there you go! I’m in love, my daughter’s in love, and my husband’s in love with the price. That’s a win/win, don’t ya think?

white cabinet

I almost forgot…Dutch Boy sent me the paint for this project (free!!). It’s painted Timeless Ivory, and it’s just that. What a classically beautiful shade. It’s perfect.

Royal Show and Share Day

Royal Show and Share Day

0 Edit Artikel

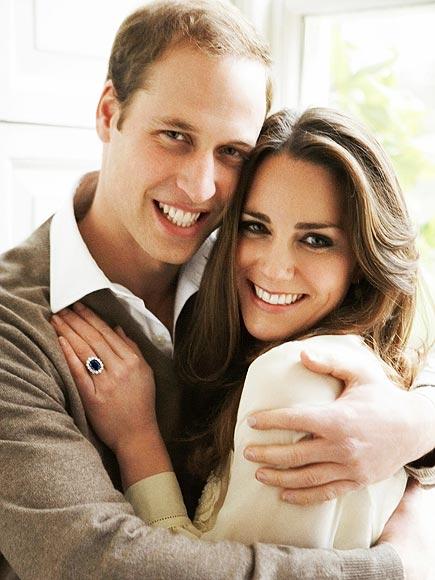
Yes. I’m one of them. I’ll be getting up at 5am and watching the event of year (decade?). Then I will shoot a direct line of coffee into my veins to keep me from falling asleep at work.

WILLIAM & KATE   photo | Kate Middleton, Prince William

It’s not something I follow on a daily basis, but it’s such an intriguing lifestyle, no? I can’t wait!

William and Kate Wedding Portrait

So…link up and give us crazy early risers something to check on while we tape our eyelids open!

Pottery Barn Outlet=BFF

0 Edit Artikel

Well, I don’t have a PB outlet (nor do I have a HomeGoods, but I won’t talk about that right now. Sensitive subject), but my Mom does! Guess who went back home for Easter and totally scored? Me. I did.

My intention was to find a rug. You know, thee rug. No such luck. My mom, however, bought my daughter this duffle bag for Easter. The website is selling it for $70. The outlet is selling it for $30. Say wha?

Jet-Set Duffle, Dark Coffee Berkeley

And now for the best part. I’ve been looking for a counter-height craft desk for months now. No exaggeration. I finally conceded that I would just have to make one myself. While I was not happy about that idea, I figured it was my only option. Plus, I knew it would probably cost me more than I wanted to spend.

Until….PB stepped it up. This is currently on sale for $450. Take a moment to soak that in. With tax and shipping, we’re talking about a small desk for over $500. Huh?

Pottery Barn craft desk

So this is actually the one I found. I don’t want a dark desk, but as I examined it a little more closely, I realized that we just might be a perfect match. You wanna know the price, don’t you?Pottery Barn craft desk

Here’s how the markdowns went on the tag…

$499

$299

$199

$150

$99 (another 10% off)

$89 OUT. THE. DOOR

While it doesn’t come without its hiccups, I’m willing to invest a little work into it. Other than the scratches on top, it’s in perfect condition. Well, it will be when I finish it up.

Pottery Barn desk Of course, it’ll have to wait its turn. I am FINALLY done with the pain in my butt cabinet, and now I’m just letting it dry another night before I put it back together. Soooo close.

white hutch

I’ve gotta dress her up a bit, and I’ll be back. Until then, a word of advice for you—when in doubt about ordering something from Pottery Barn, try their outlets first!